Mail Setup
- To use IGB Mail server requires special permission. Most users will be using Outlook 365
Basic Information
- IMAP - Incoming Email
IMAP server: mail.igb.illinois.edu
IMAP port: 143
IMAP Connection Security: STARTTLS
IMAP Authentication Method: Normal Passowrd
- SMTP - Outgoing Email - netid@igb.illinois.edu
SMTP Server Name: mail.igb.illinois.edu
SMTP Port: 587
SMTP Connection Security: STARTTLS
SMTP Authentication Method: Normal Password
SMTP Username: NetID
- SMTP - Outgoing Email - netid@illinois.edu
SMTP Server Name: outlook.office365.com
SMTP Port: 587
SMTP Connection Security: STARTTLS
SMTP Authentication Method: OAuth2
SMTP Username: netid@illinois.edu
Enable Vacation Message
Enable Spam Filtering
Webmail
To access Webmail go to http://mail.igb.illinois.edu and select Roundcube. You will use your IGB username and password to login.
Thunderbird EMail Client Setup
Email Setup
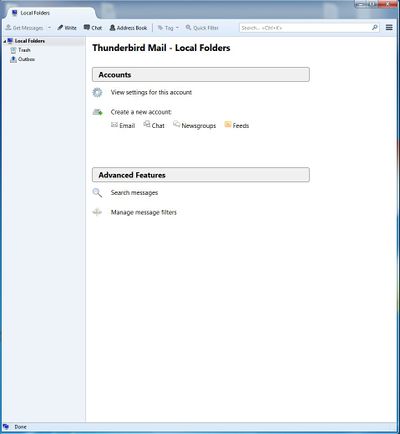
The first time that you use Thunderbird, you will need to configure it to send/receive your mail. You will probably get a screen like this:
- If this is the first time opening Thunderbird, the Wizard will start automatically. If not, Click "Create a new account" in the main window.
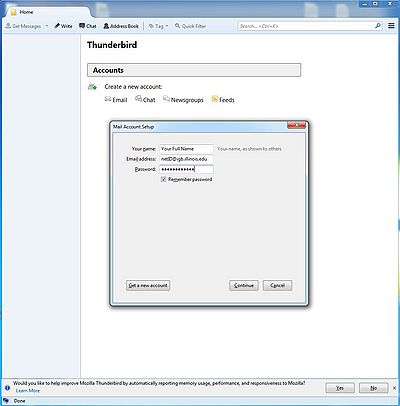
- The Mail Account Setup screen will show. Please enter the required information.
- Your Full Name
- Your email address. It will be netID@igb.illinois.edu.
- Your IGB password.
- Click "Continue".
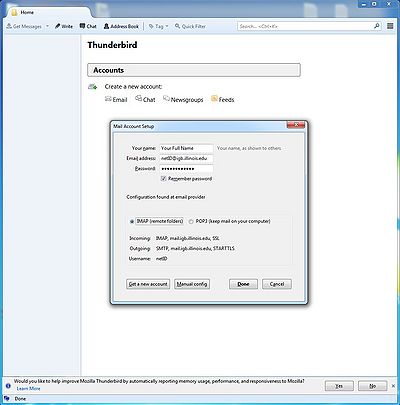
- At the next screen. Select IMAP for checking your mail.
- IMAP leaves the mail on the mail server. Thus many mail clients are able to see the same emails.
- Hit "Done" to finish setting up your email
Additional Settings
Additional settings can be set in Tools -> Options such as:
- General: for setting up for Thunderbird will notify you when you get new mail
- Security -> Junk: for setting up Junk Mail filters
- Message Filters can be set under Tools -> Message Filters
Setting up UIllinois Address Book
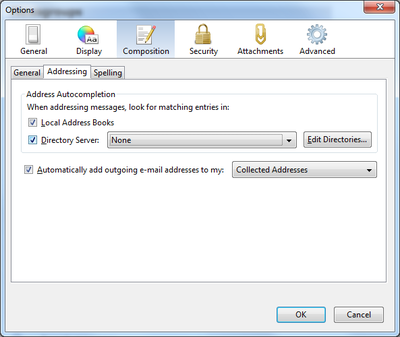
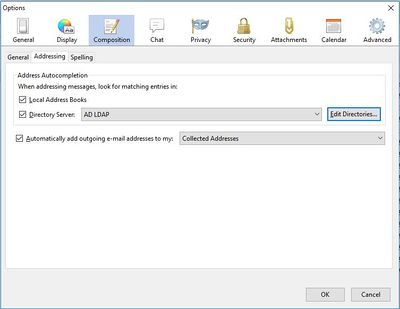
- If you want to be able to use ldap in Thunderbird, Go to Tools -> Options (If you are using a Mac, go to Thunderbird -> Preferences.) Then go to Composition -> Addressing:
- Check the box next to Directory Server and click on "Edit Directories"
- When a window pops up, click "Add"
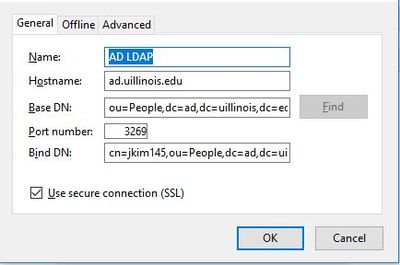
- A Directory Server Properties window will show up. Fill the information as follows:
- In the General tab enter:
- Name: AD LDAP
- Hostname: ad.uillinois.edu
- Base DN: ou=People,dc=ad,dc=uillinois,dc=edu
- Port Number: 3269
- Bind DN: cn=<netid>, ou=People,dc=ad,dc=uillinois,dc=edu (where <netid> is replaced with your actual netid)
- Check the Use secure connection (SSL) checkbox
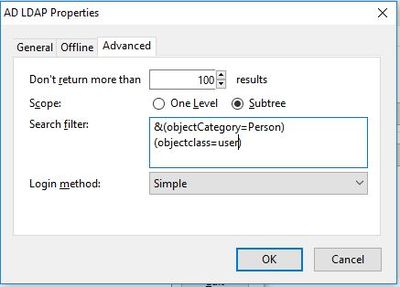
- In the advanced tab, enter:
- Scope: Subtree
- Search filter: &(objectCategory=Person)(objectclass=user)
- Login method: Simple
- Click OK to add the ldap to your list and click okay to go back to the options window.
- Under the drop down, select "AD LDAP". Your options window should look like this:
