Difference between revisions of "File Server Access"
Jump to navigation
Jump to search
(→OS X) |
|||
| (149 intermediate revisions by 10 users not shown) | |||
| Line 1: | Line 1: | ||
| − | + | __TOC__ | |
| + | * Purpose: Store files for different IGB themes, groups, and users | ||
| + | * Hostname: '''file-server.igb.illinois.edu''' | ||
| + | * Username: Your campus NetID | ||
| + | * Password: Your IGB Password. If you do not know your IGB password, you can reset it by going to [https://illinoisauth.igb.illinois.edu/password https://illinoisauth.igb.illinois.edu/password] | ||
| − | + | = File Server Policy = | |
| + | By using the file server you agree to follow the [[File Server Policy]] | ||
| − | == | + | = Traditional Connection (SMB) = |
| + | * This is an easy way to connect when you are physically on UofI campus. | ||
| + | * If you are not on campus, you will first need to connect to the campus '''Cisco VPN'''. There is a guide at [https://answers.uillinois.edu/illinois/page.php?id=98773 https://answers.uillinois.edu/illinois/page.php?id=98773]' | ||
| − | == Connect From Windows | + | == Connect From Windows == |
| − | * | + | * In Windows: Click on the '''Search''' box in the lower left of your desktop, enter '''\\file-server.igb.illinois.edu''' and hit Enter on your keyboard. |
| + | [[File:File-server-1.jpg|400px]] | ||
| − | + | * Enter your IGB username and password | |
| + | * If you want Windows to save your username and password, you need to put in IGB\netID and Password. Then select '''Remember my Credentials'''. Withot the '''IGB\''', Windows will not save the username and password. | ||
| + | [[File:File-server-credentials.jpg|400px]] | ||
| + | * If connection was successful, you should have a window to select from 3 different shares: '''groups''', '''themes''', or '''users''' folders | ||
| + | [[File:File-server-connect.jpg|500px]] | ||
| − | + | == Connect From MAC OS X == | |
| − | |||
| − | + | * Click on '''Go''' >> '''Connect to Server''' >> type '''smb://file-server.igb.illinois.edu''' for the server address and click '''Connect'''. | |
| + | [[File:File-server-osx.jpg||500px]] | ||
| + | *Enter your netID and IGB password | ||
| + | [[File:File-server-osx-2.jpg|500px]] | ||
| + | * Select the folder you would like to connect to from the drop down list and click OK | ||
| + | [[File:File-server-osx-3.jpg|500px]] | ||
| − | + | = SFTP Protocol = | |
| − | * | + | * The SFTP protocol will work from on and off campus without the need for the campus '''Cisco VPN''' |
| − | + | * Rsync will not work on the file-server as this requires SHELL access which is a security risk | |
| − | [[ | + | == Windows == |
| + | * Download WinSCP installation package from [http://winscp.net/eng/download.php http://winscp.net/eng/download.php] and install it. | ||
| + | * Once installed Run WinSCP >> enter '''file-server.igb.illinois.edu''' for the Host name >> Enter your IGB user name and password and click Login | ||
| + | [[File:File-server-winscp-1.jpg|500px]] | ||
| + | * Once you hit "Login", you should be connected to the file server, as shown below. On the left hand side is your local hard drive. The right hand side should default to your personal '''home''' folder on the file-server. | ||
| + | [[File:File-server-winscp-2.jpg|500px]] | ||
| + | * You can navigate to the '''Themes''' and '''Groups''' folders by selecting the dropdown list with your netID. Then select '''/''' directory and then navigate to '''/file-server''' folder. | ||
| − | == | + | == MAC OS X == |
| − | *To download | + | *To download Cyberduck go to [http://cyberduck.io http://cyberduck.io] and click on the large Zip icon to download. |
| − | *Once | + | *Once Cyberduck is installed on OSX you may start the program. |
| − | *Click on '''Open Connection''' | + | *Click on '''Open Connection.''' |
*From the drop down menu at the top of the popup window select '''SFTP(SSH File Transfer Protocol)''' | *From the drop down menu at the top of the popup window select '''SFTP(SSH File Transfer Protocol)''' | ||
| − | + | [[File:Cyberduck screenshot sftp.png|350px]] | |
| − | [[ | ||
*Now in the '''Server:''' input box enter '''file-server.igb.illinois.edu''' and for Username and password enter your IGB credentials. | *Now in the '''Server:''' input box enter '''file-server.igb.illinois.edu''' and for Username and password enter your IGB credentials. | ||
| − | [[ | + | [[File:Cyberduck inputbox.png|350px]] |
| − | + | *Click '''Connect.''' | |
| − | *Click '''Connect''' | ||
*You may now drag and drop files in and out of your file server folder. | *You may now drag and drop files in and out of your file server folder. | ||
| − | = | + | = Public HTML = |
| − | + | * Each user is allowed to setup a public_html folder in their home folder to serve simple web pages. Only html pages are allowed. No PHP, Python, Perl CGI, or other more advance web page formats are allowed. | |
| − | * | + | * To get this setup, please email [mailto:help@igb.illinois.edu help@igb.illinois.edu] |
| − | + | * The web address will be [https://file-server.igb.illinois.edu/~netID https://file-server.igb.illinois.edu/~netID] | |
| + | = Scan Documents = | ||
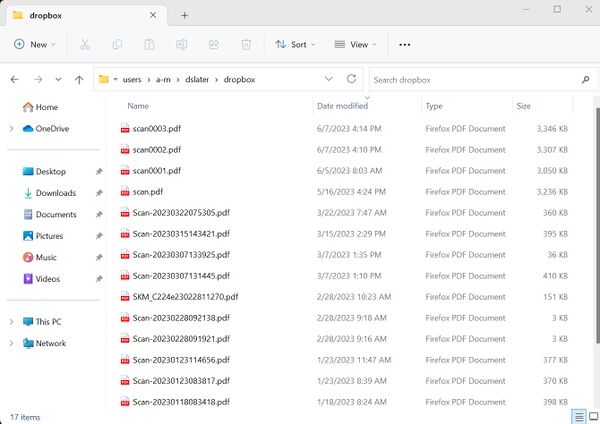
| + | [[File:File-server-dropbox.jpg|right|border|600px]] | ||
| + | * Scan documents from the various scanners in the building can be sent directly to your '''dropbox''' folder in your personal '''home''' folder. | ||
| + | * There is a guide on scanning documents at [https://help.igb.illinois.edu/Network_Scanning https://help.igb.illinois.edu/Network_Scanning] | ||
| + | <br clear=all> | ||
| + | = Backups = | ||
| + | * The file-server has 2 separate backup systems setup. | ||
| + | * The first system creates a daily snapshot of the filesystem each evening. There is '''10''' days worth a snapshots. A user is able to go back to a snapshot and copy the data back to their original location in case of accidental deletion. | ||
| + | * The second system is a traditional backup system using Bacula backup system, [https://www.bacula.org/ https://www.bacula.org/]. This creates a backup each night and is stored for years onto tapes at an offsite location. | ||
| + | * If your need data restored that is greater than '''10''' days, please contact CNRG at [mailto:help@igb.illinois.edu help@igb.illinois.edu] to restore the data. | ||
| − | <br> | + | == Restore data using snapshots == |
| + | === Windows === | ||
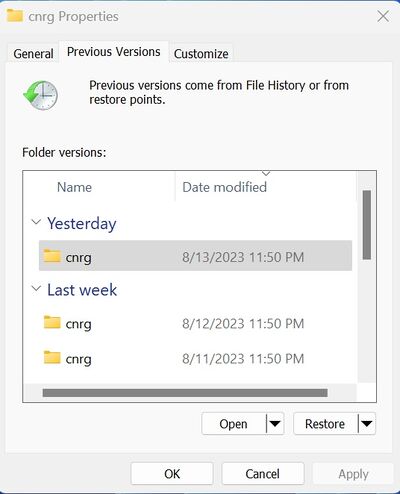
| + | [[File:File-server-previous-versions.jpg|right|border|400px]] | ||
| + | *To restore from Windows, go to the folder where the data is missing. Right click on that folder and select '''Properties'''. Then select '''Previous Versions''' tab. It should list previous versions of the folder you select. | ||
| + | * Double click on the snapshot you want. Then select the files and directories and copy them back to their original location. | ||
| + | * The snapshots get erased every '''10''' days. If you do not copy the data back, then you will not be restoring the data and the snapshot will eventually be lost. | ||
| + | <br clear=all> | ||
| − | + | === OS X or SFTP === | |
| + | * Navigate to the '''SNAPSHOT''' directory in the '''Themes''', '''Groups''', '''Users''' folders | ||
| + | * Select the date for the share you want to restore from | ||
| + | * Once you have found your data, copy it back to its original location. | ||
| + | * The snapshots get erased every '''10''' days. If you do not copy the data back, then you will not be restoring the data and the snapshot will eventually be lost. | ||
| − | + | == Restore data after '''10''' days == | |
| − | * | + | * If your need data restored that is greater than '''10''' days, please contact CNRG at [mailto:help@igb.illinois.edu help@igb.illinois.edu] to restore the data. |
| − | + | * This requires use to restore from our Bacula tape backup system which can take a few days in order to retrieve backup tapes from the offsite location. | |
Latest revision as of 14:31, 21 August 2023
Contents
- Purpose: Store files for different IGB themes, groups, and users
- Hostname: file-server.igb.illinois.edu
- Username: Your campus NetID
- Password: Your IGB Password. If you do not know your IGB password, you can reset it by going to https://illinoisauth.igb.illinois.edu/password
File Server Policy[edit]
By using the file server you agree to follow the File Server Policy
Traditional Connection (SMB)[edit]
- This is an easy way to connect when you are physically on UofI campus.
- If you are not on campus, you will first need to connect to the campus Cisco VPN. There is a guide at https://answers.uillinois.edu/illinois/page.php?id=98773'
Connect From Windows[edit]
- In Windows: Click on the Search box in the lower left of your desktop, enter \\file-server.igb.illinois.edu and hit Enter on your keyboard.

- Enter your IGB username and password
- If you want Windows to save your username and password, you need to put in IGB\netID and Password. Then select Remember my Credentials. Withot the IGB\, Windows will not save the username and password.

- If connection was successful, you should have a window to select from 3 different shares: groups, themes, or users folders

Connect From MAC OS X[edit]
- Click on Go >> Connect to Server >> type smb://file-server.igb.illinois.edu for the server address and click Connect.

- Enter your netID and IGB password

- Select the folder you would like to connect to from the drop down list and click OK

SFTP Protocol[edit]
- The SFTP protocol will work from on and off campus without the need for the campus Cisco VPN
- Rsync will not work on the file-server as this requires SHELL access which is a security risk
Windows[edit]
- Download WinSCP installation package from http://winscp.net/eng/download.php and install it.
- Once installed Run WinSCP >> enter file-server.igb.illinois.edu for the Host name >> Enter your IGB user name and password and click Login

- Once you hit "Login", you should be connected to the file server, as shown below. On the left hand side is your local hard drive. The right hand side should default to your personal home folder on the file-server.

- You can navigate to the Themes and Groups folders by selecting the dropdown list with your netID. Then select / directory and then navigate to /file-server folder.
MAC OS X[edit]
- To download Cyberduck go to http://cyberduck.io and click on the large Zip icon to download.
- Once Cyberduck is installed on OSX you may start the program.
- Click on Open Connection.
- From the drop down menu at the top of the popup window select SFTP(SSH File Transfer Protocol)

- Now in the Server: input box enter file-server.igb.illinois.edu and for Username and password enter your IGB credentials.

- Click Connect.
- You may now drag and drop files in and out of your file server folder.
Public HTML[edit]
- Each user is allowed to setup a public_html folder in their home folder to serve simple web pages. Only html pages are allowed. No PHP, Python, Perl CGI, or other more advance web page formats are allowed.
- To get this setup, please email help@igb.illinois.edu
- The web address will be https://file-server.igb.illinois.edu/~netID
Scan Documents[edit]

- Scan documents from the various scanners in the building can be sent directly to your dropbox folder in your personal home folder.
- There is a guide on scanning documents at https://help.igb.illinois.edu/Network_Scanning
Backups[edit]
- The file-server has 2 separate backup systems setup.
- The first system creates a daily snapshot of the filesystem each evening. There is 10 days worth a snapshots. A user is able to go back to a snapshot and copy the data back to their original location in case of accidental deletion.
- The second system is a traditional backup system using Bacula backup system, https://www.bacula.org/. This creates a backup each night and is stored for years onto tapes at an offsite location.
- If your need data restored that is greater than 10 days, please contact CNRG at help@igb.illinois.edu to restore the data.
Restore data using snapshots[edit]
Windows[edit]

- To restore from Windows, go to the folder where the data is missing. Right click on that folder and select Properties. Then select Previous Versions tab. It should list previous versions of the folder you select.
- Double click on the snapshot you want. Then select the files and directories and copy them back to their original location.
- The snapshots get erased every 10 days. If you do not copy the data back, then you will not be restoring the data and the snapshot will eventually be lost.
OS X or SFTP[edit]
- Navigate to the SNAPSHOT directory in the Themes, Groups, Users folders
- Select the date for the share you want to restore from
- Once you have found your data, copy it back to its original location.
- The snapshots get erased every 10 days. If you do not copy the data back, then you will not be restoring the data and the snapshot will eventually be lost.
Restore data after 10 days[edit]
- If your need data restored that is greater than 10 days, please contact CNRG at help@igb.illinois.edu to restore the data.
- This requires use to restore from our Bacula tape backup system which can take a few days in order to retrieve backup tapes from the offsite location.