Network Scanning: Difference between revisions
| Line 22: | Line 22: | ||
* '''Sign in using your IGB account (netID and IGB password).''' | * '''Sign in using your IGB account (netID and IGB password).''' | ||
[[File:hp-scan- | [[File:hp-scan-4.png|400px]] | ||
* '''Once you sign in, the screen below will pop up.''' | * '''Once you sign in, the screen below will pop up.''' | ||
* '''You can rename your file if you would like, then click "Send" in the bottom right corner. | * '''You can rename your file if you would like, then click "Send" in the bottom right corner. | ||
[[File:hp-scan- | [[File:hp-scan-5.png|400px]] | ||
* '''You can also change options such as File Type, Color or Black and White, Size, Duplex Scanning, etc.''' | * '''You can also change options such as File Type, Color or Black and White, Size, Duplex Scanning, etc.''' | ||
Revision as of 10:57, 28 June 2022
Scanning
Scanning using these copiers is a free service provided by IGB. The scanners are located throughout the building next to the secretaries.
Retrieve Scanned Files
- Scanned documents are automatically saved to the dropbox folder located in your home folder on the file-server.
- Follow this guide if you don't know how to access the file-server File Server Access
Available Scanners
- HP LaserJet 700: Anyone with an IGB account may sign into these printers and scan to their Dropbox folder.
Scanning with the HP LaserJet 700
Basic Scanning
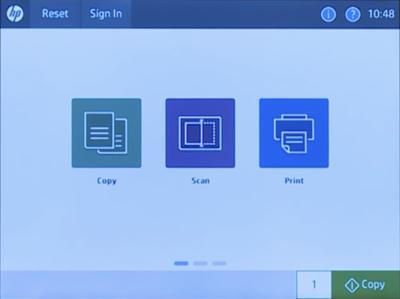
- Touch "Scan"
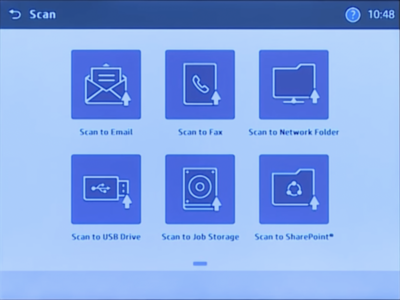
- Touch "Scan to Network Folder"
- You also have the option to email your scan or to scan to a USB drive.
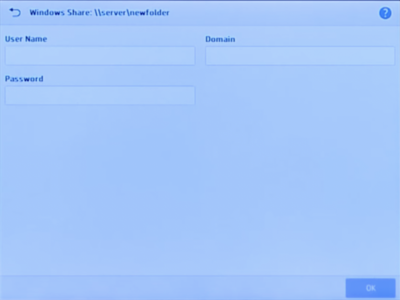
- Sign in using your IGB account (netID and IGB password).
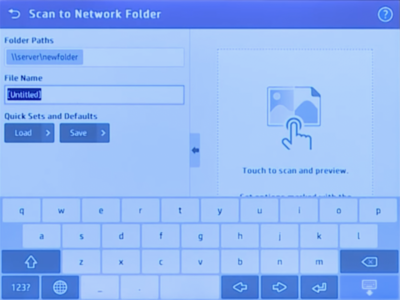
- Once you sign in, the screen below will pop up.
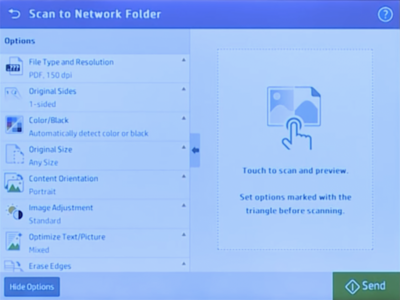
- You can rename your file if you would like, then click "Send" in the bottom right corner.
- You can also change options such as File Type, Color or Black and White, Size, Duplex Scanning, etc.
More Options
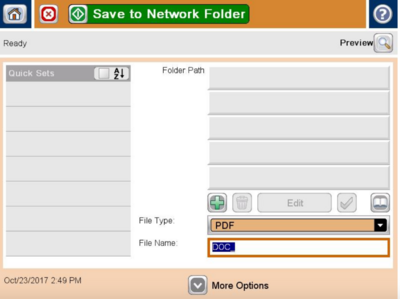
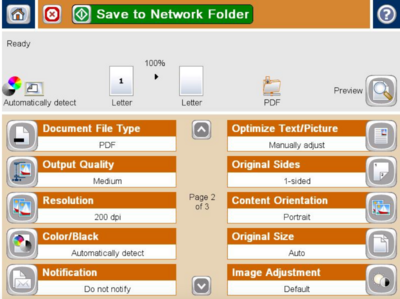
For more available Network scanning options on the LaserJet700 such as color vs. black & white, single or two-sided copies, etc., after choosing your netid and "OK", press the "More Options" button at the bottom of the following screen. You will then see the second screen shown here with ten different categories. Finally, after selecting options, press "Save to Network Folder."
Color or Black & White
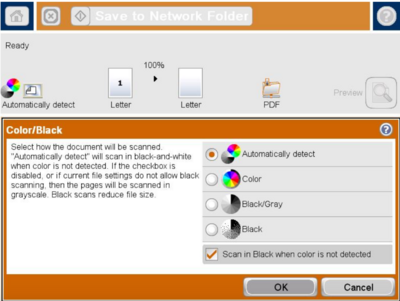
The following screen will allow you to change the copier from black and white to color. This setting shouldn't need to be changed as it should be set to automatic by default. If, however, you want a color document scanned in black and white only, use this setting. (See #More Options)
Two-sided Duplex Scanning
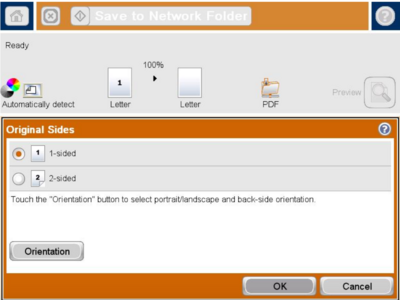
If you have a two-sided document that you want to scan, use the following settings under "Original Sides" to change it to two-sided. (See #More Options)
Text/Picture Quality
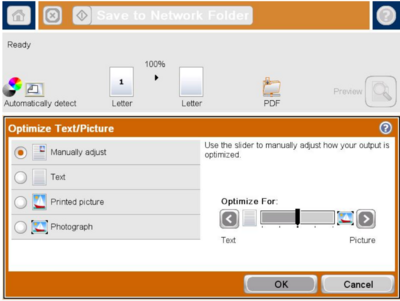
You may want to change this setting under "Optimize Text/Picture" to get better quality text or a better quality picture. (See #More Options)
File Format
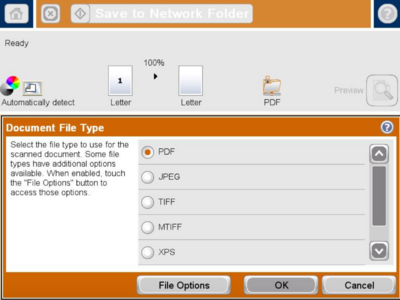
By choosing "Document File Type" you can have your scan saved in multiple formats. (See #More Options)
Available File Formats
- PDF (Default)
- JPG
- TIFF
- MTIFF
- XPS
- PDF/A
