Mail Setup: Difference between revisions
Jump to navigation
Jump to search
No edit summary |
No edit summary |
||
| Line 12: | Line 12: | ||
<br> | <br> | ||
== | == Thunderbird Mail Client Setup == | ||
The first time that you use | The first time that you use Thunderbird, you will need to configure it to send/recieve your mail. You will probably get a screen like this: | ||
*Click | *Click "Create a new account" to start the Wizard | ||
[[Image: | [[Image:Thunderbird1.png]] | ||
<br> | <br> | ||
*The | *The Mail Account Setup screen will show. It may look something like this: | ||
[[Image: | [[Image:Thunderbird2.jpg]] | ||
<br> | |||
<br> | |||
*Fill in your information | |||
*Once everything is set, say Continue. Thunderbird will then automatically setup everything for you. | |||
* | *You should see a screen like this when finished: | ||
[[Image: | [[Image:Thunderbird3.jpg]] | ||
<br> | <br> | ||
* | *Hit "Create Account" to finish setting up your email | ||
== Setting up PH Address Book == | == Setting up PH Address Book == | ||
Revision as of 15:00, 26 January 2010
Basic Information
SMTP server (sending mail, requires authentication): mail.igb.illinois.edu
POP server (incoming mail): mail.igb.illinois.edu
PH server (port 105): ns.uiuc.edu
Username: use your igb username
Password: use your igb password
Webmail
To access WebMail go to http://mail.igb.illinois.edu. You will need to use your IGB username and password.
Thunderbird Mail Client Setup
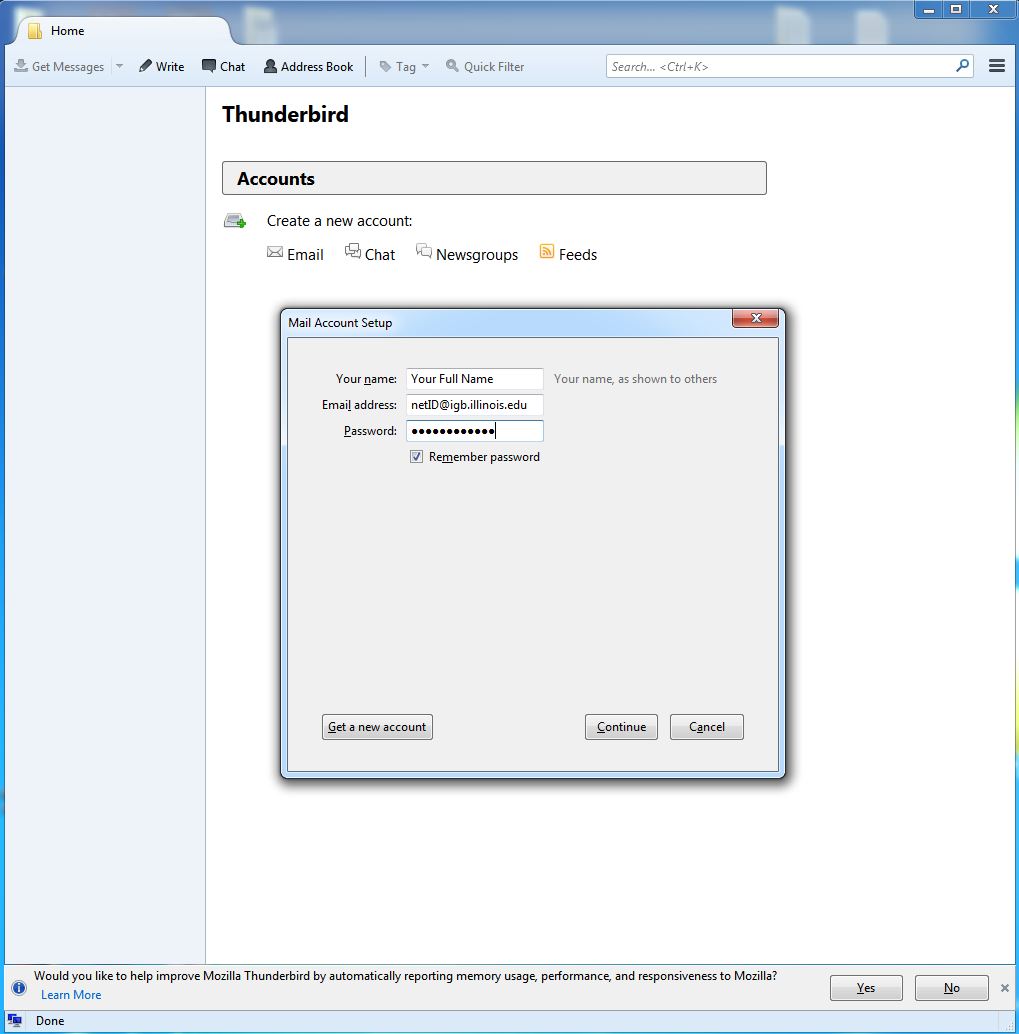
The first time that you use Thunderbird, you will need to configure it to send/recieve your mail. You will probably get a screen like this:
- Click "Create a new account" to start the Wizard
- The Mail Account Setup screen will show. It may look something like this:
- Fill in your information
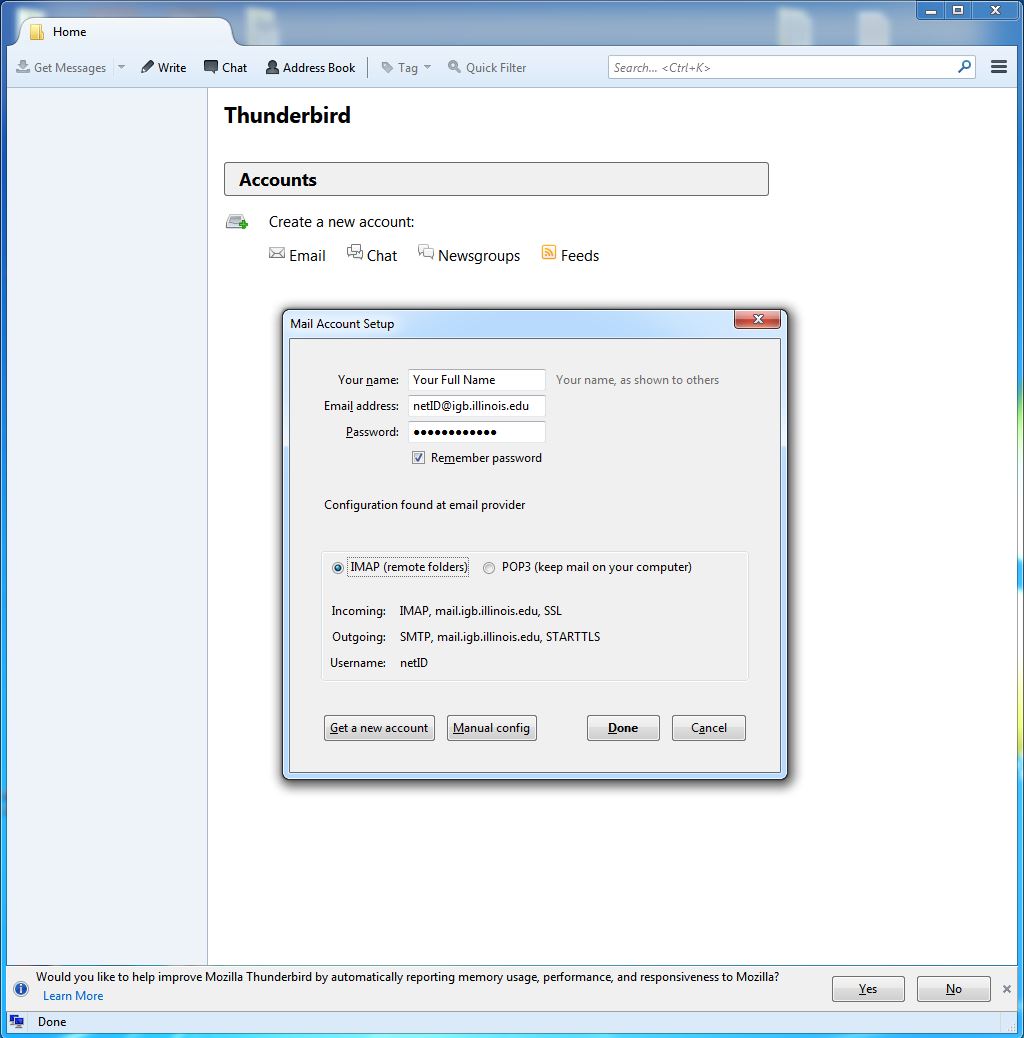
- Once everything is set, say Continue. Thunderbird will then automatically setup everything for you.
- You should see a screen like this when finished:
- Hit "Create Account" to finish setting up your email
Setting up PH Address Book
- If you want to be able to use ph in eudora, you need to set it up in the Directory Services Tab. To get there, click Tools -> Directory Services That will bring up a screen like this:
- First click on the Ph protocol under registered drivers, then click New Database. A modify database window will appear. Fill in your settings like this:
- Click OK to add the database to your list. Then make sure you have it checked, then run a few queries to make sure it works.

