Network Scanning
Scanning with the Xerox WorkCentre 5325[edit]
Scanning using these copiers is a free service provided by IGB. The scanners are located throughout the building next to the secretaries.
Retrieve Scanned Files[edit]
- Scanned documents are automatically saved to the dropbox folder located in your home folder on the file-server.
- Follow this guide if you don't know how to access the file-server File Server Access
Basic Scanning[edit]
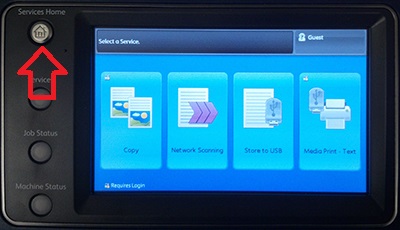
- Walk up to the copier and push the Services Home button.
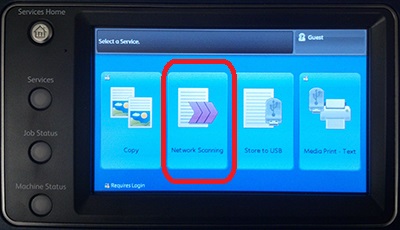
- Next push the Network Scanning icon
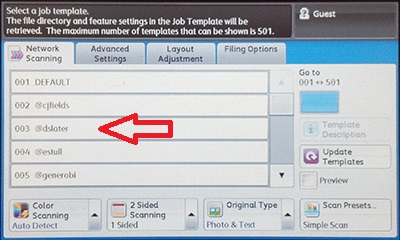
- Next select your netid by scrolling up and down by pushing the up and down arrows and then touching your netid.
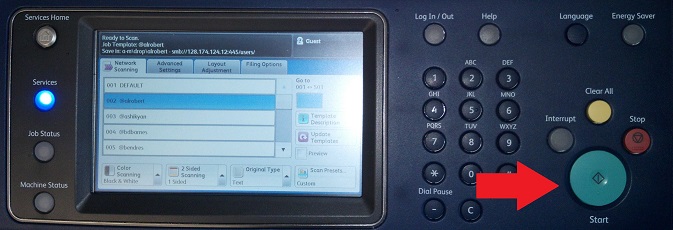
- Finally add your paper to the paper feeder or on the scanning/copying surface and push the Start Button
Change Color/Black&White[edit]
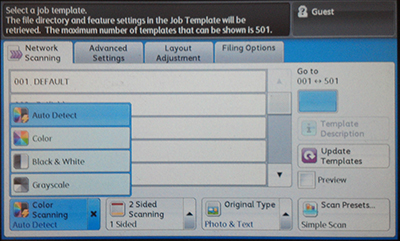
The following screen will allow you to change the copier from black and white to color. This setting shouldn't need changed as it should be set to automatic by default. If, however, you want a color document scanned in black and white only, use this setting.
Two Sided Duplex Scanning[edit]
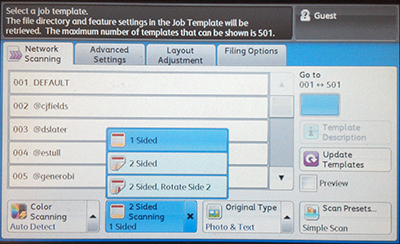
If you have a two sided document that you want to scan, use the following settings to change it to 2 sided.
Text Quality[edit]
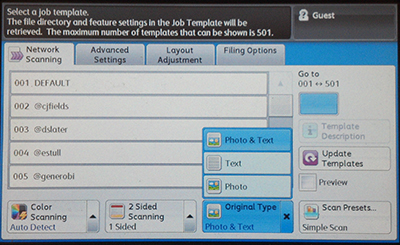
If you have just text on the document you may want to change this setting to get better quality text.
File Format[edit]
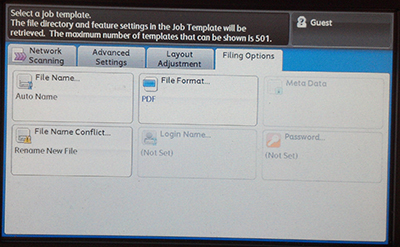
Available File Formats
- PDF (Default)
- JPG
- TIFF
The following setting you will notice is in a different tab of the scanner settings (Push on Filing Options to get to these settings). Once here you can have your scan saved in multiple formats
Scanning - LaserJet 700[edit]
Retrieve Scanned Files[edit]
- Scanned documents are automatically saved to the dropbox folder located in your home folder on the file-server.
- Follow this guide if you don't know how to access the file-server File Server Access
Basic Scanning[edit]
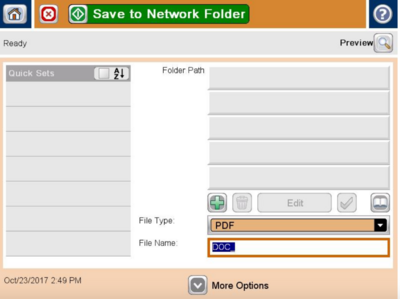
- Touch "Save to Network Folder"
- Choose the address book at the bottom right
- Choose your netid from the list on the left and then press the arrow. Your netid will show up on the right. Press "OK"
- NOTE: If your netid is not listed, send an email to help@igb.illinois.edu and request that your netid be added to the LaserJet 700 for scanning.
- Press "Save to Network Folder" at the top of the page. When finished, press the Home icon at the top left to return to the Home screen.
More Options[edit]
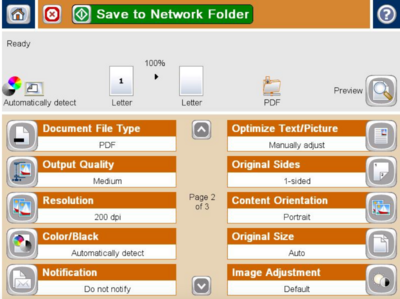
For more available Network scanning options on the LaserJet700 such as color vs. black & white, single or two-sided copies, etc., after choosing "Save to Network Folder" on the Home screen, press the "More Options" button at the bottom of the following screen. You will then see the second screen shown here with ten different categories.
Color or Black & White[edit]
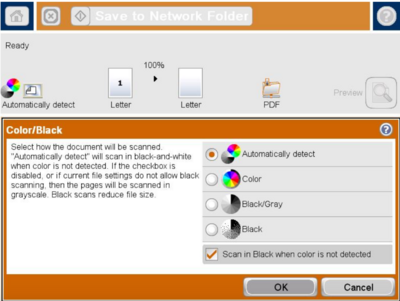
The following screen will allow you to change the copier from black and white to color. This setting shouldn't need to be changed as it should be set to automatic by default. If, however, you want a color document scanned in black and white only, use this setting.
Two-sided Duplex Scanning[edit]
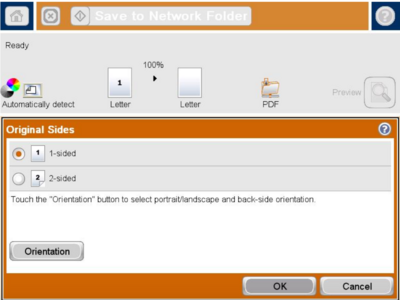
If you have a two-sided document that you want to scan, use the following settings under "Original Sides" to change it to two-sided.
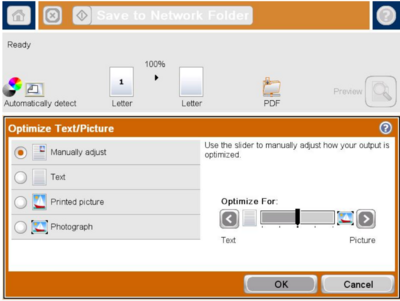
Text/Picture Quality[edit]
You may want to change this setting to get better quality text or a better quality picture.
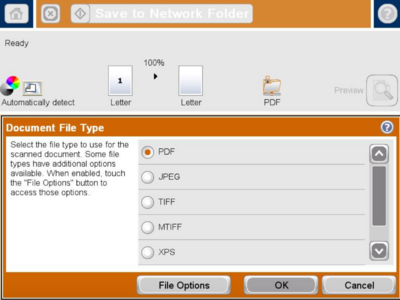
File Format[edit]
Here you can have your scan saved in multiple formats.
Available File Formats
- PDF (Default)
- JPG
- TIFF
- MTIFF
- XPS
- PDF/A
