Remote Desktop: Difference between revisions
Jump to navigation
Jump to search
mNo edit summary |
No edit summary |
||
| Line 1: | Line 1: | ||
== Remote Desktop | __TOC__ | ||
* | |||
* | == Installing and Using Cisco VPN == | ||
* | *You HAVE to be connected to the VPN in order to use Remote Desktop | ||
* | <div class="toccolours mw-collapsible mw-collapsed" style="width:900px"> | ||
* | === Macintosh OSX === | ||
*You | <div class="mw-collapsible-content"> | ||
* | ==== Installing Cisco VPN ==== | ||
*Purchase this free offer for the Cisco VPN from the Webstore: https://webstore.illinois.edu/Shop/product.aspx?zpid=2600 | |||
*Go to the location where you saved the VPN installation package. | |||
*Double-click on the .pkg file. | |||
*The AnyConnect Installer will launch. Click "Continue". | |||
*;[[File:macvpn.png|400px]] | |||
*Accept the End User License Agreement (EULA) when prompted: First click "Continue", then "Agree" | |||
*;[[File:macvpn2.png|400px]] | |||
*;[[File:macvpn3.png|400px]] | |||
*Click "Install" | |||
*;[[File:macvpn4.png|400px]] | |||
*You'll be prompted to enter your local computer username and password. | |||
**Enter your local username (It may already be inputted) | |||
**Enter your local computer password | |||
**Click "Install Software" | |||
*;[[File:macvpn5.png|400px]] | |||
*After it's installed, you will see a window saying it installed successfully. Click "Close". | |||
*;[[File:macvpn6.png|400px]] | |||
==== Connecting to Cisco VPN ==== | |||
</div></div> | |||
<div class="toccolours mw-collapsible mw-collapsed" style="width:900px"> | |||
=== Windows 10 === | |||
<div class="mw-collapsible-content"> | |||
</div></div> | |||
== Finding Your IP Address == | |||
*You will need the IP address of the computer you are trying to remotely access. | |||
<div class="toccolours mw-collapsible mw-collapsed" style="width:900px"> | |||
=== Macintosh OSX === | |||
<div class="mw-collapsible-content"> | |||
</div></div> | |||
<div class="toccolours mw-collapsible mw-collapsed" style="width:900px"> | |||
=== Windows 10 === | |||
<div class="mw-collapsible-content"> | |||
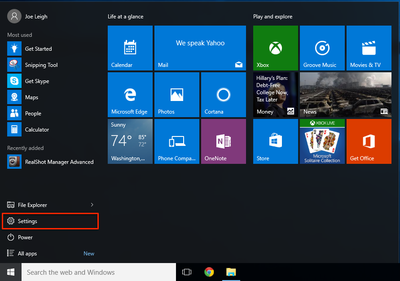
*Open the Settings window by going to: Start -> Settings | |||
*;[[File:Win10PrinterSetup1.png|400px]] | |||
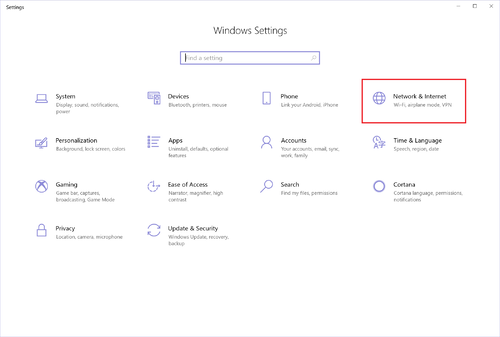
*Click "Network & Internet" | |||
*;[[File:Win10ip.png|500px]] | |||
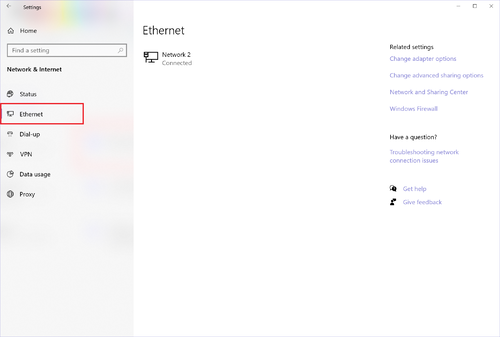
*Click "Ethernet" in the left-hand side. | |||
*;[[File:Win10ip2.png|500px]] | |||
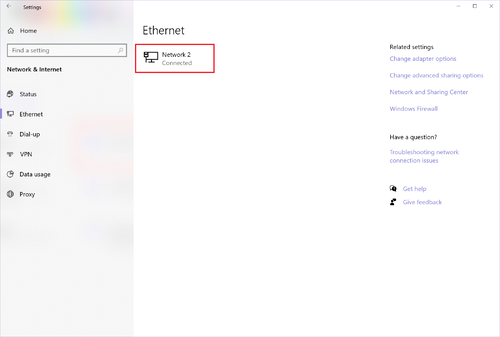
*Click on the Connection that is connected. | |||
*;[[File:Win10ip3.png|500px]] | |||
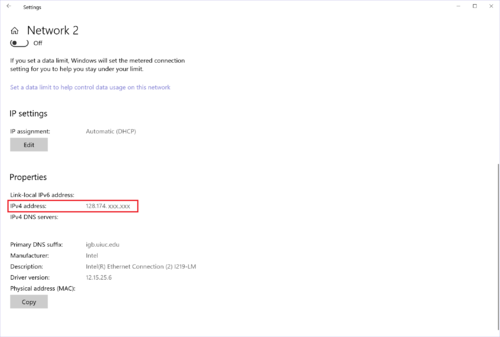
*Scroll down and find your "IPv4 Address" This is your computer's IP address. | |||
*;[[File:Win10ip4.png|500px]] | |||
</div></div> | |||
Revision as of 08:58, 12 March 2020
Installing and Using Cisco VPN
- You HAVE to be connected to the VPN in order to use Remote Desktop
Macintosh OSX
Installing Cisco VPN
- Purchase this free offer for the Cisco VPN from the Webstore: https://webstore.illinois.edu/Shop/product.aspx?zpid=2600
- Go to the location where you saved the VPN installation package.
- Double-click on the .pkg file.
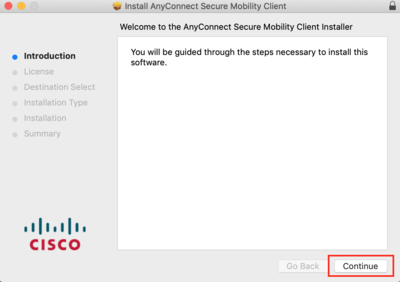
- The AnyConnect Installer will launch. Click "Continue".
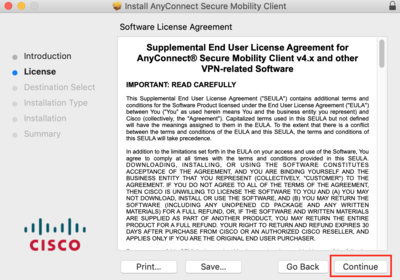
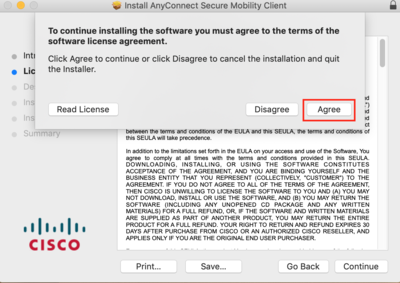
- Accept the End User License Agreement (EULA) when prompted: First click "Continue", then "Agree"
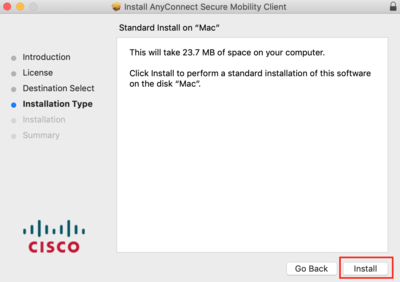
- Click "Install"
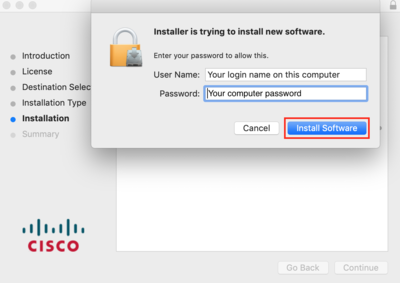
- You'll be prompted to enter your local computer username and password.
- Enter your local username (It may already be inputted)
- Enter your local computer password
- Click "Install Software"
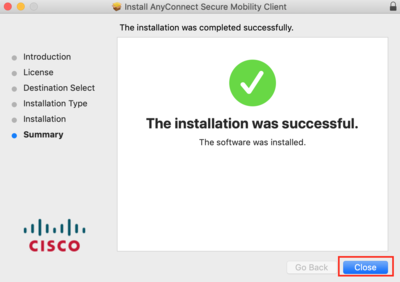
- After it's installed, you will see a window saying it installed successfully. Click "Close".
Connecting to Cisco VPN
Windows 10
Finding Your IP Address
- You will need the IP address of the computer you are trying to remotely access.
