Remote Desktop: Difference between revisions
Jump to navigation
Jump to search
No edit summary |
|||
| Line 69: | Line 69: | ||
*Once all the above is complete, follow these directions to actually connect remotely to the PC. | *Once all the above is complete, follow these directions to actually connect remotely to the PC. | ||
<div class="toccolours mw-collapsible mw-collapsed" style="width:900px"> | <div class="toccolours mw-collapsible mw-collapsed" style="width:900px"> | ||
=== Macintosh OSX === | === Macintosh OSX to Connect to a Windows Computer === | ||
<div class="mw-collapsible-content"> | <div class="mw-collapsible-content"> | ||
| Line 75: | Line 75: | ||
<div class="toccolours mw-collapsible mw-collapsed" style="width:900px"> | <div class="toccolours mw-collapsible mw-collapsed" style="width:900px"> | ||
=== Windows 10 === | === Windows 10 to Connect to a Windows Computer === | ||
<div class="mw-collapsible-content"> | <div class="mw-collapsible-content"> | ||
*Open the Windows Menu, scroll down and click on "Windows Accessories", and then click on "Remote Desktop Connection" | *Open the Windows Menu, scroll down and click on "Windows Accessories", and then click on "Remote Desktop Connection" | ||
| Line 86: | Line 86: | ||
*;[[File:rdc4.png|400px]] | *;[[File:rdc4.png|400px]] | ||
*The desktop of the computer you are connecting to will pop up, and you can access it as though you are sitting in front of that computer. | *The desktop of the computer you are connecting to will pop up, and you can access it as though you are sitting in front of that computer. | ||
</div></div> | |||
=== Macintosh OSX to Connect to a Mac Computer === | |||
<div class="mw-collapsible-content"> | |||
</div></div> | |||
=== Windows 10 to to Connect to a Mac Computer === | |||
<div class="mw-collapsible-content"> | |||
</div></div> | </div></div> | ||
Revision as of 13:26, 12 March 2020
Installing and Using Cisco VPN
- You HAVE to be connected to the VPN in order to use Remote Desktop
Macintosh OSX
- Follow campus' guide for installing and using Cisco VPN, located at this link: https://answers.uillinois.edu/illinois/page.php?id=47629
Windows 10
- Follow campus' guide for installing and using Cisco VPN, located at this link: https://answers.uillinois.edu/illinois/page.php?id=47507
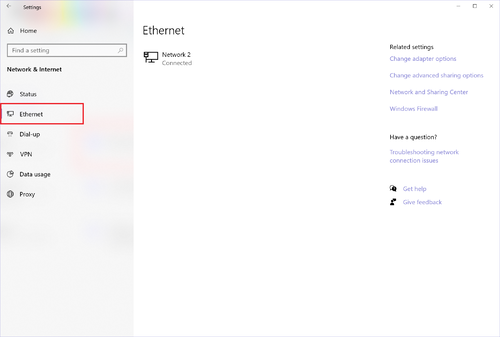
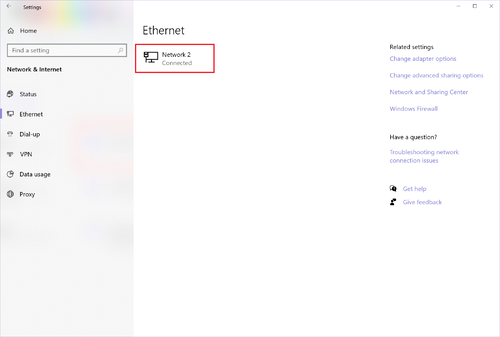
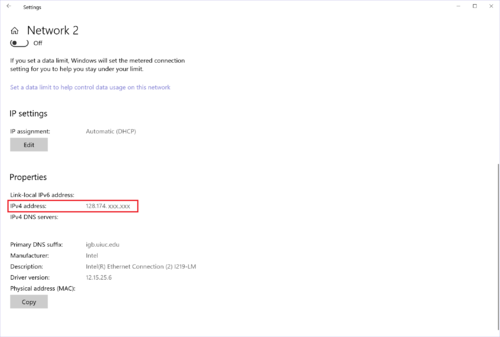
Finding Your IP Address
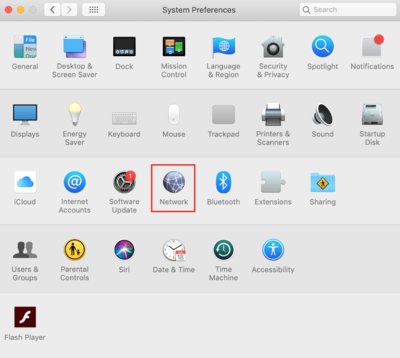
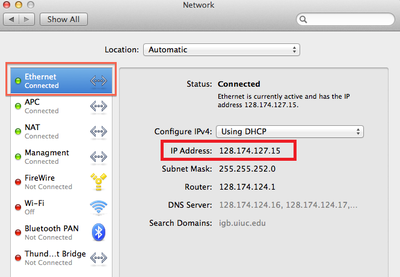
- You will need the IP address of the computer you are trying to remotely access.
Macintosh OSX
Windows 10
Remote Connection Settings
- You will to correctly set the following settings on the computer you are trying to remotely access to allow it.
Macintosh OSX
Windows 10
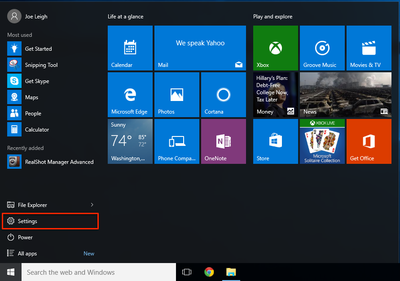
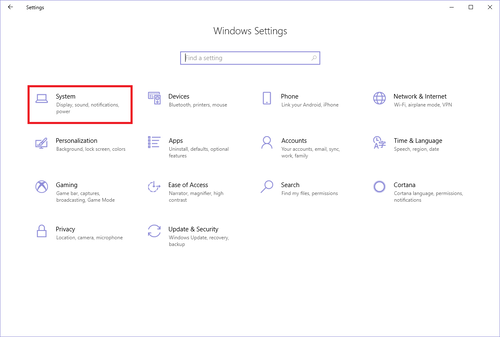
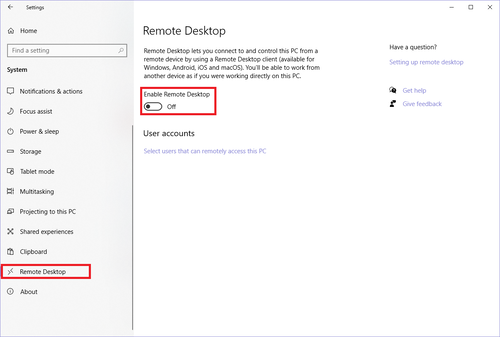
- Open the Settings window by going to: Start -> Settings
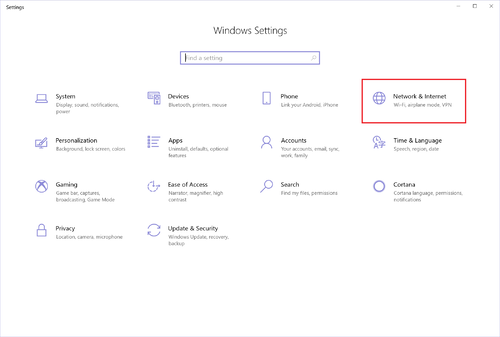
- Click "System"
- Click "Remote Desktop" in the left-hand side and then Click the slider to turn the option for "Enable Remote Desktop" from "Off" to "On".
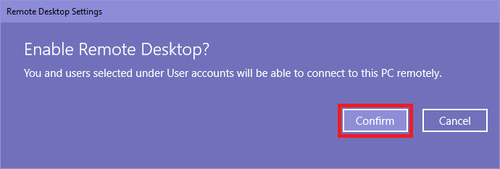
- A window will pop up asking if you want to Enable Remote Desktop? Click "Confirm"
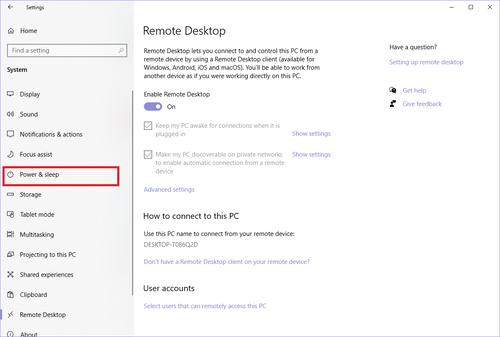
- Next, you have to change your sleep settings so that your computer stays awake to access. Click on "Power & sleep" at the left-hand side of the window.
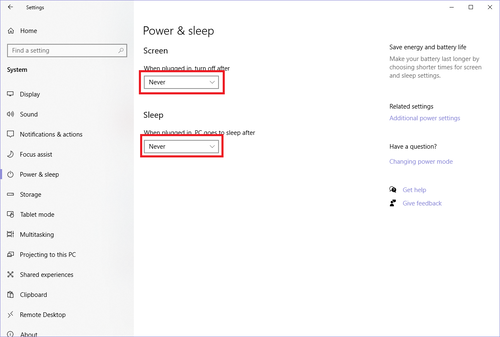
- Change both the "Screen" and "Sleep" settings to "Never".
Remote Connection
- Once all the above is complete, follow these directions to actually connect remotely to the PC.
Macintosh OSX to Connect to a Windows Computer
Windows 10 to Connect to a Windows Computer
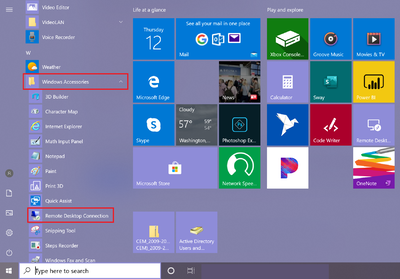
- Open the Windows Menu, scroll down and click on "Windows Accessories", and then click on "Remote Desktop Connection"
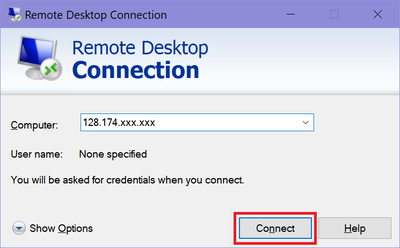
- In the window that opens, enter the IP address you found earlier into the box for "Computer". Click "Connect".
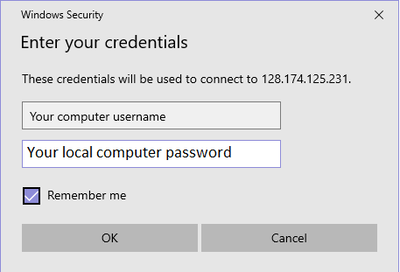
- Another window will pop up asking for your credentials. These credentials are the username and password for the computer you are trying to connect to.
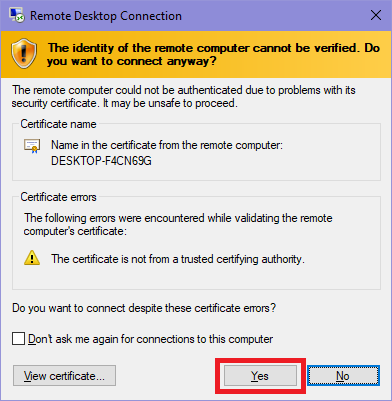
- When the window below pops up, click "Yes" to connect.
- The desktop of the computer you are connecting to will pop up, and you can access it as though you are sitting in front of that computer.
